
Chickpea burgers/tacos/flat falafels/wraps/whatever

I’m not sure really what to call these because I ate them a couple different ways and they’re similar to a couple different standard dishes.
Originally, I was looking for a new way to use chickpeas. I love hummus and all, but something a bit more substantial would be nice, ya know? So when I ran across these, we thought they’d be worth a shot. They’re called burgers there, but tucked into a pita with a yogurt/tahini sauce and sprouts….which sounds a lot more like a larger, flattened falafel to me.
Anyway, it was worth a shot. We soaked and cooked the chickpeas (why use canned when the dry ones are so freakin’ cheap and easy to do yourself?). I had every intention of making some pitas….but then, well, didn’t. And for the same reason of time constraint, we couldn’t really throw together a loaf of bread either.
But corn tortillas I could do! Five minutes to mix and let set, and then another 2-3 per tortilla for frying? Easy peasy.

Here’s what they should look like before ^….and then below is what they should look like after. Well, minus the bleh lighting. Take note in the above one that it’s on half a ziploc bag. Best trick ever for using a tortilla press…..slit a plastic bag in half and place your tortillas in between there.

This one was caught bursting with smiles…or something cheesy like that:

Oh, and just so you know… If you try to rush to finish a sauce while you leave one in a pan too long, it burns. It’s still edible when it’s brown like this, but it smells exactly like burnt popcorn. Can’t imagine why… :P

Even though I didn’t have time to make pitas, I apparently had time to let my yogurt strain.

This is to let a lot of the liquid drain out, leaving you with a thick, creamy, almost greek yogurt texture to use for a sauce.

Put a layer of cheesecloth in a strainer and let it sit for a couple hours (or overnight in the fridge even if you want). Use plain yogurt, not vanilla, and if you’re one of those people who don’t like to use full fat, real yogurt, be prepared for a lot of liquid in your 2% milk versions:

^ That’s a ton of liquid in that bowl considering I was only straining a cup of yogurt.

The burgers were a cinch to throw together. All the ingredients got tossed into the food processor and because I apparently left the chickpeas too hot, the mixture was put in the fridge for a few minutes to harden up. It was just enough to form several little patties without them falling apart.
Made the sauce while the tortillas and burgers were frying, and it all came together nicely.

Eaten like this, they were definitely more like falafel taco combos, but were delicious beyond my expectations. The burgers were thin/thick enough to be soft on the inside but crispy on the outside. I could’ve gone for some lettuce or sprouts in them as well, but I had already devoured two wraps, plus some extra patties on the side before I thought to add anything else.
Wanna make your own? Here are the recipes for everything above:
Chickpea burgers – Inspired by Eating Well
- 1 19-ounce can chickpeas, rinsed – We used a couple cups of fresh ones
- 4 green onions, trimmed and sliced
- 1 egg
- 2-4 tablespoons all-purpose flour
- Some oregano – I don’t know how much
- 1/4 teaspoon salt
- 2 tablespoons extra-virgin olive oil – for frying
- Seems like we added some hot sauce, too…like some chili garlic paste….because the original recipe called for cumin as well, but meh…..add what you want…it’ll be amazing regardless
Place everything but the oil into your food processor and pulse. You could also mash the chickpeas by hand with a fork, but it’ll take longer….then add your other ingredients. Expect a lumpier, coarser mix this way, but the idea is the same.
If using a food processor, stop a couple times to scrape down the sides and check to see if the mixture holds together. If it’s too wet, add a bit more flour. It should be moist, but it should hold shape, too, so if it’s falling apart from being too dry or wet, add ingredients accordingly. If the mixture feels excessively warm from handling, toss it in the fridge or freezer for a few minutes.
Heat oil over medium-high heat in your favorite pan. Form chickpea mixture into whatever size patties you prefer. Cook 2-3 minutes per side….or until they’re brown and to your desired crispiness…which is of course going to vary, depending on the size of your burgers/patties.
Tzatziki Sauce – Inspired by All Recipes
This isn’t authentic tzatziki, but I didn’t want the tahini sauce that the previous recipe suggested, so I combined a few tzatziki recipes for this.
1 cup plain yogurt (strain if you don’t want it to be runny) 1 clove crushed garlic 1/4 teaspoon salt Some black pepper 1/2 large cucumber, peeled, seeded, shredded Again, this was done in the food processor to make it fast. To cut down on liquid again, slice or shred your cucumber a bit in advance, lay out on a plate, and sprinkle with salt. When you’re almost ready to use it, rinse and squeeze it dry. It’ll retain a bit of the salt, so watch out when it comes to adjusting your recipe, but much of the moisture will be removed. Then pulse everything and refrigerate while you wait.
Corn tortillas – Inspired by the bag of masa :P
- 1 cup masa harina
- 2/3 cup water
- 1/8 tsp. salt
Combine and mix thoroughly for 2 minutes. if dough is dry, add more water (about a teaspoon at a time). They should hold their shape, but not stick to your hand. If you pinch off a piece and roll it into a small ball, press it flat between your thumb and finger….if the edges crack, add a little more water.
Divide into 8 equal balls. Cover with a damp cloth to keep them moist. Let set for a few minutes while you prepare your tortilla press.
Heat ungreased griddle skilled on med-high. Cook them one at a time for about a minute, then turn and cook for another minute. Depending on the heat of your skillet, you may find you need another minute per side. They’re done when they start showing slight brown marks like in the first picture of my cooked tortillas above. The second side may not brown the same because the edges sometimes start to curl and not all parts will touch the pan.
(The browned marks on this tortilla even lined up to be the perfect nose as I was putting my falafel tacos together, hehe)
Enjoy!
What does summer mean to you? – Neighbors, friends, family, strangers offloading garden abundance
Oh yeah! I haven’t had a garden since I was little, but it never fails that at some point in the season, there’s somebody who is desperate to get rid of dozens of tomatoes, zucchini, cucumbers, or whatever else they planted far too much of.
In this case, a friend of the family steadily supplied us with tomatoes all season long last year. Whatever we could pick, we could have, as they were already over run with picking their own and for family. And there was always tons left even after we walked away with bags’ full.


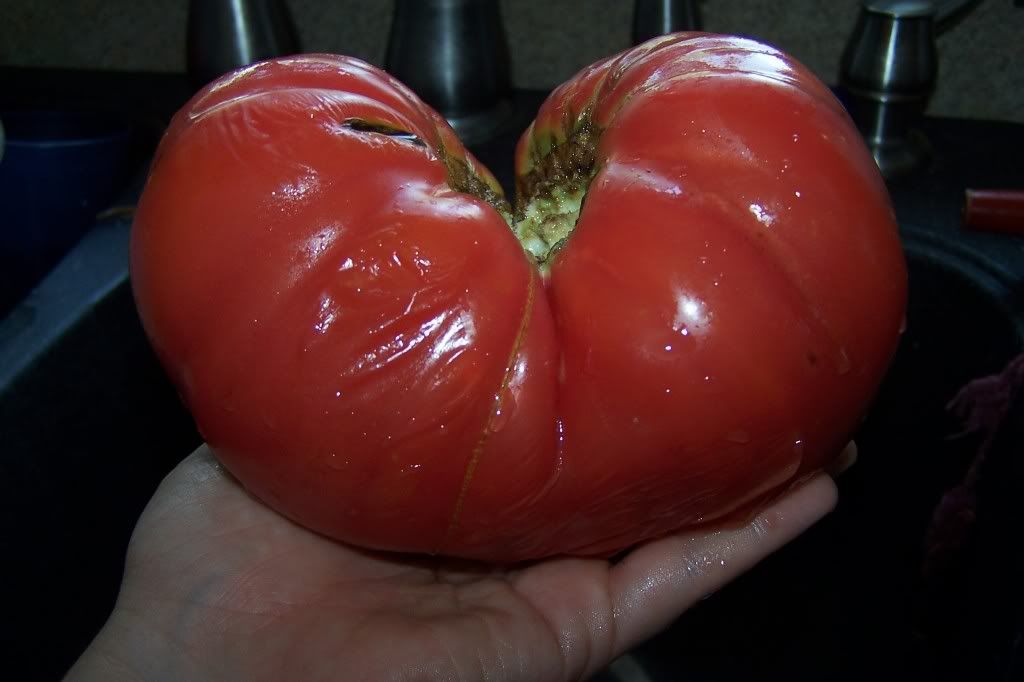
Aren’t they gorgeous? Yum.
And that giant above? His skin was a bit tough, but he peeled and sliced nicely into large steaks of tomato.


And in case you’re wondering how to use up a large amount of tomatoes in a short amount of time, turn ‘em into pasta sauce. I made my life easier by mass blanching, peeling, and slicing all in one go.

Tip: Stand at a low-sitting table or countertop (this works especially well if you’re short like I am, so you don’t strain your back leaning over). Place the cutting board on the edge and scoop the tomatoes and sauce directly off into a bowl or crockpot on the floor. Don’t worry, you can transfer it all to another dish after, if you’re squeamish about your floors being dirty.
Although if you’re squeamish, I wouldn’t recommend this anyway, because uh, you may get tomato juice between your toes. But it makes it so fast! Hehe.

See? It’s a mess, but from left to right, I had an entire baking sheet of blanched/peeled tomatoes, the cutting board I was using, the diced tomatoes were scooped forward toward myself and the tops pushed to the side. You can also see a crockpot I’d already filled, my laptop, various drinking options, a basket of produce, and the slotted spoon I used to dip out the tomatoes in the background.
I kept blanching continuously until I made it through them all, chopping and dicing during the minute they were in the water. I was through them in no time, but boy did it look a mess for a bit, ha.
Subs, subs, and more subs – How to mass produce sandwiches for a crowd
My family loves subs. The kids, the adults, the animals….we’re all happy for gatherings because it’s almost guaranteed that we’ll have subs on at least once and nobody’s wallets will be broken in the process.
There are pictures from one of our dozens of gatherings in the last few years, but I don’t recall which. When I run across more pictures, I’ll update with some of the variations we’ve created. This set is pretty basic.

If you check a chain grocery store like Kroger’s, they’ll usually have these loaves of bread for about a dollar a piece. They’re gigantic but delicious.

Don’t slice them all the way through. You want to create a pocket for all the goodies instead of them slipping and sliding out.

Add your mayonnaise and Italian dressing to both top and bottom, but don’t overdo it. If you’re going to be eating soon, put the dressing first to cut down on some of the mess. If these will be going in the fridge for a while, put the mayo first to create a barrier between the bread and dressing so the bread doesn’t get soggy.

A little goes a long way. You can see that I used half slices of one of the meats and the cheese doesn’t create a solid layer. There are enough toppings that you don’t need a huge amount of each.


Use fresh veggies, but don’t limit yourself to tomatoes and lettuce. Onions, avocados (replace the mayo with a layer of avocado to cut some calories/fat), cucumbers, and lots of veggies from your garden work awesome.

Notice that because the bread is so huge, there’s a cut down the middle first, so the pieces come out closer to square shape.
Also, at the far left of the picture, you can see that we put the whole subs right back in the plastic bags the bread came in. This keeps all the goodies inside and makes it a breeze to put in and out of the refrigerator if need be.
It’s also great to write across the label if you happen to have different subs. We sometimes have ones that are vegetarian or with extra dressing (or no dressing at all). No need in having to open them up to inspect the ingredients when you can just label it ahead of time and be on your way.
~Edit~ Here are a couple pictures from when we were getting ready to move. I put together 6 large sub sandwiches, stored them in the fridge, and pulled them out for various meals while we were packing, cleaning, and loading the trucks. Keep in mind that the sandwiches will hold up for a day or two (if they last that long, pfft), but you should leave the dressing/mayo off until time of serving then.


Also shared with Let’s Do Brunch linkup.


Recent Comments