Thanksgiving Turkey Cupcakes

Part of getting the last year’s worth of silly creations means that things like these Thanksgiving Day cupcakes get posted in January. Oops!
I don’t usually do anything Thanksgiving-themed for the holiday. The turkey is enough, right? But this year, in the midst of being overwhelmed with tons of ideas all over the web, I saw these and had to do them. They’re adorable! The best part was, I knew the kids would enjoy being able to decorate the turkeys themselves, so I made it an activity for one of their days out of school. Talk about a blast!

(Notice the replicate in the back has the candy corns sticking in the opposite way. And they have wings!)
Now these weren’t just ordinary cupcakes either, so that made for some interesting results.
No, these cupcakes come from a box mix (gasp! me? not making it from scratch?? ahh!). And instead of the oil and eggs, they have pumpkin puree in them. This makes for insanely moist, delicious cupcakes that everyone raved over (before ‘and’ after knowing I’d put pumpkin in them). Oh, and did I mention that it makes them quite a bit healthier, too? Win-win situation.
“Insanely moist” means they melt in your mouth, but they also do in your hand a little bit, too, hehe. I didn’t have much trouble with them, but B*, being 7 and overly excited with slightly less coordinated fingers, had some major issues with hers.

Her turkey most definitely had some extra junk in the trunk and that created what could only be seen as a chocolate and candy corn mudslide. Under the weight of the candy and the pressure of her fingers trying to put them in so carefully, the whole back end of her turkey collapsed and started to fall off. Moist cupcake and icing to the rescue, we were able to piece it back together, though.

Some cupcakes were easier created than others. Some done with more care, and a few hurried because of utter excitement of getting to work with icing for the first time. They all managed to turn out with their own unique characteristics, though. “Mine has the most beautiful feathers.” “Mine has the biggest butt!” “Mine’s the cutest. Look at those cheeks!”

And boy did that one have some fat cheeks! In the end, though, the only thing left was to debate which to eat first. Head or tail?
Gnocchi Potato Frog Mountain…Thing…

During my first attempt at making my own gnocchi, I had it all planned out and prepped. I carefully peeled all the potatoes, cooked them an appropriate level of yumminess, and then proceeded to measure them out. My 1-cup measuring cup was dirty so I grabbed my half-cup one and went at it.
The next thing I knew, I was pouring the rest of the ingredients onto my board and being asked what I was making. I started explaining gnocchi, but B wouldn’t have any of it. “Nooo, I mean, is that a mountain?” Of course it is! Er. Well, sorta. With snow! I added two cloves of garlic and suddenly it looked more like a frog. Oops.

You see it, right? Right?? Hmmm….
Peanut Butter and Jelly Cupcakes


The first time I saw these a couple months ago, I knew I had to make them. I don’t usually make or eat peanut butter and jelly sandwiches very often, but who isn’t familiar with them as a traditional sandwich? I love that the classic dish has been transformed into a fun dessert or snack. What a cute treat to put in a kid’s lunch box for school, too!
To make them yourself, you can find the recipe at Taste and Tell.
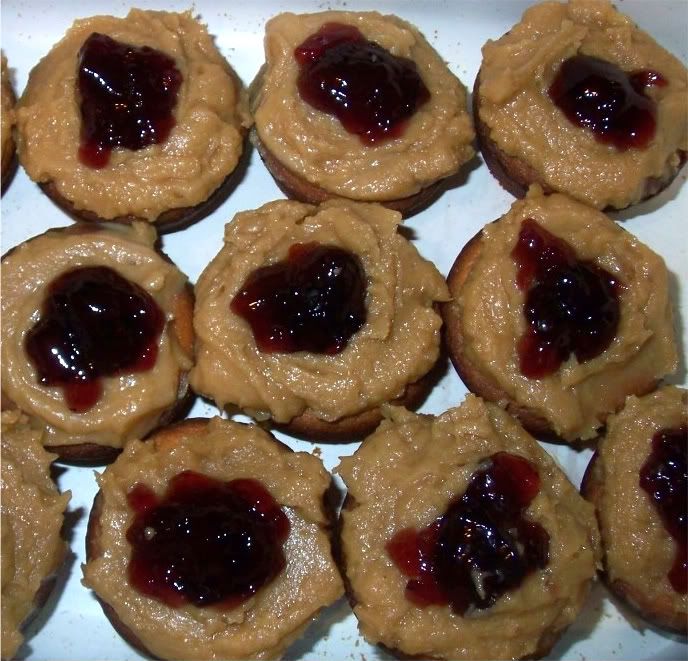
Like Deborah, I found that I had to add extra sugar to the icing to give it any sweetness at all. I know the jelly has some sweetness, but the “icing” in its printed form just tastes like extra creamy peanut butter and there’s nothing unique about it without the extra sugar.
Oh, and I used regular peanut butter, not the natural kind that she experimented with.

Straight out of the oven with a slight conical shape
Tip: Flatten the tops gently when they come out of the oven to create an even surface for the icing and “well” of jelly.

Slightly flattened and ready to be iced.
Tip: Spread the icing on in an even layer. Using a small spatula, place the tip in the middle and turn gently to create a hole for the jelly.


Recent Comments